Blog
How to Program a 3-Button Garage Door Opener Remote: Step-by-Step Guide
Author
Ray
Published
Category
Guide
Learn how to program a 3-button garage door opener remote step by step, troubleshoot common issues, and program multiple garage doors safely.


Author
Ray
An experienced automation specialist with a strong background in motor technology and industrial solutions. With years of expertise in central motors, tubular motors, and automation systems, the author is dedicated to sharing insights that connect engineering innovation with real-world applications. Passionate about advancing reliable, energy-efficient, and high-performance automation products for global markets.
What’s better than insider perks, pro tips, and surprises?
Sign up to get the most recent blog articles in your email every week.
Join now.
WHY I WRITE THIS
About my business
Our company’s main product lines include tubular motors, sliding gate motors, swing gate motors, roller shutter motors, and other door automation solutions, all manufactured by trusted partner factories we have worked with for many years.
Our Services
I help them with sales and export operations, while our company also provides sourcing and procurement services in China to help international clients solve supply-related challenges. If you need assistance with procurement, please feel free to contact us.
How to Program a 3-Button Garage Door Opener Remote
A garage door remote makes it easy to open and close your garage without leaving your vehicle. However, when you purchase a new remote, replace a lost remote, or need to connect an additional remote, you must program it to the garage door opener.
If you are wondering how to program a garage door opener, the process is usually straightforward when the opener uses a LEARN or PROGRAM button.
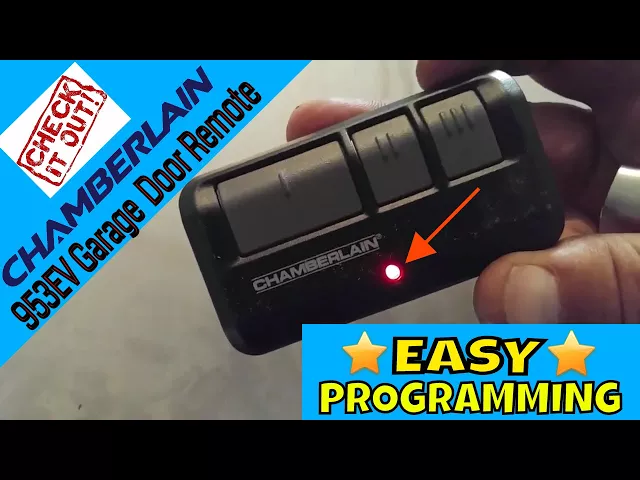
A 3-button remote can be particularly useful because each button can be assigned to a different garage door or compatible device. Chamberlain's current 3-button remotes, for example, are designed to control up to three garage doors or gates, depending on compatibility.
This guide explains how to program a 3-button garage door opener remote, how the LEARN button works, how to program multiple doors, and what to check if the remote does not work after programming.
What Is a 3-Button Garage Door Remote?
A 3-button garage door remote is a handheld wireless transmitter with three independently programmable buttons.
Instead of using one remote for one garage door, the three buttons can potentially control multiple compatible garage door openers.
For example:
Remote Button | Possible Function |
|---|---|
Button 1 | Garage Door 1 |
Button 2 | Garage Door 2 |
Button 3 | Garage Door 3 |
This is useful for homes with multiple garage doors, detached garages, workshops, or gates.
However, the number of buttons on the remote does not automatically mean that every garage door opener will be compatible. Compatibility depends on the opener's radio technology, frequency, security system, and LEARN-button type.
Chamberlain's official compatibility information recommends checking the opener's LEARN button before selecting a replacement remote.
Before You Start Programming
Before learning how to program a garage door opener, prepare the remote and opener.
Check the Remote Battery
Make sure the remote has a working battery.
A weak battery can cause problems such as:
The indicator light does not illuminate
The opener does not respond
The remote works only at a very short distance
Programming appears successful but the door does not operate
Many modern Chamberlain remotes use a CR2032 coin-cell battery, although the correct battery depends on the specific remote model.
Check the Garage Door Opener
Locate the garage door opener motor unit, normally mounted on the ceiling of the garage.
Look for a button labeled:
LEARN
PROGRAM
SET
SMART
The exact location and button color depend on the opener model.
For example, Chamberlain's current compatibility information uses different LEARN-button colors to distinguish opener systems, including yellow, purple, green, and orange/red.
Keep the Door Area Clear
Before testing the remote, make sure people, pets, vehicles, and other objects are away from the garage door.
The garage door can move immediately after successful programming.
How to Program a 3-Button Garage Door Opener Remote
For a compatible Chamberlain-style opener with a LEARN button, the basic process is simple.
Step 1: Locate the LEARN Button
Stand underneath the garage door opener and locate the LEARN button.
On many Chamberlain openers, the LEARN button is located on the motor unit near the antenna wire.
The exact button color varies by model, so do not assume that every Chamberlain opener uses the same programming method.
Step 2: Press and Release the LEARN Button
Press the LEARN button once and release it.
Do not hold the button down unless the opener's manual specifically instructs you to do so.
The opener will enter programming mode.
On many models, an indicator light will remain on for a limited period, giving you time to program the remote.
Step 3: Select One Button on the Remote
Choose which button you want to use.
For example:
Button 1 → Main Garage Door
Press and hold the selected button on the remote.
Step 4: Wait for the Opener to Confirm Programming
Continue holding the selected remote button until the opener provides a confirmation, such as a flashing light or an audible click.
Release the remote button after confirmation.
The exact confirmation method can vary depending on the opener and remote model.
Step 5: Test the Remote
Stand a safe distance away from the garage door and press the programmed button once.
The garage door should begin operating.
If nothing happens, wait a few seconds and try the programming procedure again.
How to Program All Three Buttons
One of the main advantages of a 3-button garage door remote is that you can use different buttons for different doors.
For example:
Button 1
Program Button 1 to Garage Door A.
Button 2
Move to Garage Door B and repeat the programming procedure.
Button 3
Move to Garage Door C and repeat the process again.
This gives you:
Remote Button | Door |
|---|---|
1 | Garage Door A |
2 | Garage Door B |
3 | Garage Door C |
Chamberlain states that its 3-button remote can control up to three garage doors or gates when compatible.
How the LEARN Button Works
The LEARN button is one of the most important parts of modern garage door opener programming.
It places the opener's receiver into a temporary programming mode. During this period, the opener can learn the identification or security code transmitted by a compatible remote.
Different generations of garage door openers use different radio technologies.
For example, Chamberlain's current compatibility information lists systems including:
Security+ 3.0
Security+ 2.0
Security+
Billion Code
and different LEARN-button colors are associated with different systems.
This is why you should verify remote compatibility before purchasing a replacement.
What If the Garage Door Remote Does Not Work?
If you have completed the programming process but the door does not respond, check the following items.
Check the Battery
Replace the remote battery with the correct battery type.
A weak battery is one of the simplest causes of remote failure.
Check Remote Compatibility
Not every 3-button remote works with every garage door opener.
Check:
Opener brand
Opener model
LEARN-button color
Security technology
Operating frequency
Remote model
Chamberlain recommends using its compatibility information to match a replacement remote with the opener.
Try Programming Again
The opener may have timed out before the programming process was completed.
Press the LEARN button again and repeat the programming sequence.
Check the Wall Control
If the wall-mounted garage door control also fails to operate the door, the problem may not be the remote.
Possible causes include:
Opener power problem
Motor problem
Safety sensor issue
Control wiring problem
Logic board problem
Check the Safety Sensors
Most modern residential garage door openers use photoelectric safety sensors.
Make sure both sensor units are:
Properly aligned
Clean
Connected
Showing their normal indicator lights
Safety sensors are designed to prevent the door from closing when an obstruction is detected. Chamberlain's current openers include this type of safety protection.
Why Is My Garage Door Remote Only Working Sometimes?
Intermittent operation can have several causes.
Weak Battery
This is the first thing to check.
Excessive Distance
Remote range can be affected by:
Building materials
Metal structures
Electrical interference
Vehicle position
Other wireless devices
The published range of a compatible remote is typically measured under favorable conditions and may vary in actual installations.
Radio Interference
Electronic equipment near the garage opener can sometimes interfere with wireless signals.
Try operating the remote from different locations to determine whether the problem is related to range or interference.
Damaged Remote
If the remote has been dropped, exposed to water, or physically damaged, its buttons or internal electronics may no longer work correctly.
Can One 3-Button Remote Control Three Garage Doors?
Yes, if the remote and all three garage door openers are compatible.
Each button can be programmed independently.
For example:
Button 1 → Home Garage
Button 2 → Workshop
Button 3 → Detached Garage
However, having three buttons does not guarantee universal compatibility.
Always verify the remote's compatibility with each opener before programming. Chamberlain specifically describes its compatible 3-button remotes as capable of controlling up to three garage doors or gates.
Can I Program a New Remote Without the Old Remote?
In many cases, yes.
If you have access to the garage door opener motor unit and its LEARN/PROGRAM button, you generally do not need the old remote to program a compatible replacement.
The basic process is:
Locate the LEARN button.
Press and release it.
Select a button on the new remote.
Complete the programming sequence.
Test the remote.
However, the exact procedure depends on the opener and remote model.
How to Erase a Garage Door Remote
If a remote has been lost or stolen, you may want to remove its programming from the garage door opener.
Many garage door openers provide a method for clearing previously learned remote controls.
However, do not press and hold the LEARN button randomly, because the exact erase procedure varies between models and may remove all programmed remotes.
If you need to erase all remotes, consult the opener's model-specific instructions first.
3-Button Remote vs. 1-Button Remote
The main difference is the number of independently assignable controls.
Feature | 1-Button Remote | 3-Button Remote |
|---|---|---|
Control one door | Yes | Yes |
Control multiple doors | Limited | Yes |
Multiple programmable buttons | No | Yes |
Suitable for multiple garages | Limited | Excellent |
Easy to carry | Yes | Yes |
A 3-button remote is generally more convenient when one person needs access to multiple compatible doors.
Frequently Asked Questions
How do I program a garage door opener remote?
Locate the opener's LEARN or PROGRAM button, press and release it, then press the desired button on a compatible remote according to the opener's programming procedure. After confirmation, test the remote.
How do I program a 3-button garage door opener?
Program each button individually. Start with the LEARN button on the opener, then select the remote button you want to assign to that opener.
Can all three buttons control different garage doors?
Yes, provided the remote is compatible with all three garage door openers. A compatible Chamberlain 3-button remote can control up to three garage doors or gates.
Why won't my Chamberlain remote program?
Check the remote battery, opener compatibility, LEARN-button type, and programming sequence. If programming mode times out, repeat the process.
What color is the LEARN button on a Chamberlain garage door opener?
The color depends on the opener's generation and technology. Chamberlain documentation identifies yellow, purple, green, and orange/red LEARN-button systems, among others.
Can I program a garage door remote without the old remote?
Often yes. If the opener has an accessible LEARN or PROGRAM button and the replacement remote is compatible, the old remote is generally not required.
How many garage doors can a 3-button remote control?
A compatible 3-button remote can control up to three garage doors or gates, with one button assigned to each device.
What should I do if my remote still does not work?
Start by replacing the battery and confirming compatibility. Then repeat the programming procedure. If the wall control also fails, inspect the opener's power supply, safety sensors, wiring, and motor system.
Final Thoughts
Learning how to program a garage door opener is usually a quick process when you have a compatible remote and an opener with a LEARN button.
For a 3-button remote, the key is to remember that each button can be programmed separately. This allows one remote to control multiple compatible garage doors without carrying several individual remotes.
Before programming, always confirm the remote and opener are compatible. Chamberlain provides compatibility information based on the opener's LEARN-button type and wireless technology.
If the remote still does not operate the door after programming, troubleshoot the battery, compatibility, programming sequence, safety sensors, and opener itself before assuming the remote is defective.
For safety, keep people, pets, and vehicles away from the door while testing the opener and follow the specific instructions for your garage door opener model.
Other Blogs